Get the retro feel of the Super Nintendo and other old consoles with the Raspberry Pi Zero. The great Raspberry Pi is already enjoying great popularity. Whether as a media center or home control. You can now recreate a Game Boy with a Raspberry Pi Zero. The replicated version is much more powerful than the device from the 90s. Donkey Kong or Super Mario in colour are no problem!
Nice handicraft project: Game Boy Zero!
Build a Game Boy? What’s the point?
With a project like this, the way is the goal. (But the result is quite impressive!) All parts have to be ordered by yourself. There’s also no getting around soldering. But you don’t have to spend a lot of money for this project. The result looks like this:
If you can’t remember the old days too well – and maybe even remember the display in such a colorful way – take a look at the following picture:
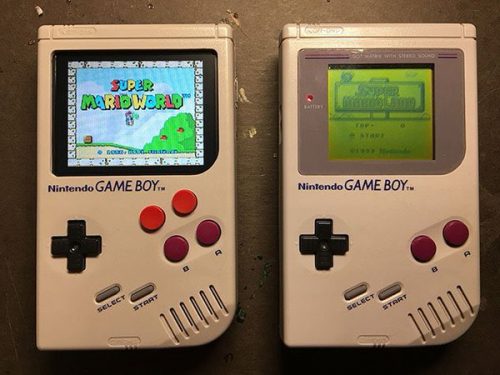
The display is also much higher quality and more colourful. In this case, a screen that was actually intended for the car is used – as a reverse screen. A quite reasonable misuse!
In addition to the display, the battery, the Raspberry Pi Zero, the buttons, adhesive strips, jack plugs, etc. etc. must also be purchased. Here you can see a size comparison of the minicomputers:

The Raspberry Pi Zero is already available for $5. Other components of the homemade handheld are significantly more expensive. Here is a video to give you an overview of which parts you need:
You are currently viewing a placeholder content from Default. To access the actual content, click the button below. Please note that doing so will share data with third-party providers.
The only difference to the original is the placement of two additional buttons. If you remember, the Super Nintendo Controller also had 4 buttons – the Game Boy actually only has 2. This article is not a tutorial – it just points out the possibility. To approach the project, follow the instructions Part 1 and the Part 2. Videos and picture series explain it to you step by step!
My opinion about the Raspberry Pi Zero Game Boy replica!
There are a lot of childhood memories attached to the Game Boy. Tetris, Donkey Kong, and many others were the games of my youth. Unfortunately, it would probably take a long vacation to find time for this project. But if you’re going to do it, you’re welcome to tell us how it worked out! I wish you much success! ![]()
further information and sources
[1] Game Boy Zero – Raspberrypi.org
[2] Game Boy Zero Custom Parts Guide Part 1 (sudomod.com)
[3] Game Boy Zero Custom Parts Guide Part 2 (sudomod.com)